Flipping the Middle School History Classroom- Part Two


In my last post I covered how I use the website EdPuzzle to find, edit and organize the videos my students watch for homework each night. Be sure to check out that post first if you are just joining us!

In this post, I'm going to share with you how I use Schoology in conjunction with EdPuzzle to assign these videos to my students. You can use EdPuzzle alone to assign videos, however I like to use Schoology because I use Schoology to give my tests. This allows me to have all assignments in one place.

First you will need an account for Schoology. It's really easy to sign up- AND FREE!

Next you will need to create a class.


Once inside your course, you can organize the year in any number of ways. 
You can create any folders you want. I like to organize mine by quarters. Within the quarters they are further broken down into units & chapters. I can also hide folders I don't want students to have access to yet. For example, if I am still working on the materials for a unit, or don't want them to have access to a test until test day, I can hide that folder and unhide it the morning of the test. 

You can color code the folders too. This makes my anal retentive heart pitter patter. In my folder red is for year-long/ training materials and black is for regular classroom materials. 

You can also customize your "profile pic" for the course, which you can see I've made using my favorite fonts and to match my classroom theme. 


Within each Quarter I have the units, and within each Unit Folder, I have a folder for each chapter. Within each Chapter, I have the individual assignments. You can see below that I have already written my test and have it waiting in "hidden" mode until test day. I also have already assigned the homework for this chapter and have dates assigned to them. 


Once you are in an assignment there are even MORE features. You can embed those EdPuzzle videos RIGHT into the assignment! They can watch the video, answer the questions and interact with the video and never have to leave the website. They can comment and ask questions right in the assignment and *hopefully* even help each other! You as the instructor can even see who has submitted the assignment on the right side. I will eventually write a post about how to embed these videos, but you can probably figure it out yourself because it is THAT easy. I will also eventually try to write a post about creating a test in Schoology as well.


Schoology also has a ton of resources directly within their website. The community of teachers is amazing. I would recommend joining the "Flipped Classrooms" group if you are interested in flipping your classroom. 
I'm just touching on the surface of the possibilities of this website. You can post to your wall with pictures and events. You can privately message your students. You can take attendance, you can keep your grades in their gradebook. It even offers analytics on your student's usage. 

I can't say enough about this website, so just go check it out on your own. And the best part it is completely FREE. 

One last awesome: You will not have to recreate all this next year. You can simply save everything to "My Resources" and reuse it all next year. I love efficiency! 


SaveSave

Flipping the Middle School History Classroom- Part One


This is going to be my first year teaching middle school history. One of the things that I am most excited about is going to be the ability to make my classroom as paperless as possible. I plan to do this by "flipping" my class, and using a variety of digital tools for assessments and review. I want to share each one in detail because they have been so revolutionary to my ability to make this little paperless dream of mine come true!

I'm going to describe the tools and websites I plan to use in a series of blog posts. Each of these tools I use is a game changer and I feel like deserve their own post! But first....

What is a Flipped Classroom? 
A flipped classroom is classroom in which the activities of a traditional classroom are flipped.  Instead of hearing lectures in class and then responding and practicing at home for homework, you switch those activities. So for homework, my students will watch a video on the topic we are studying (this replaces the function of the lecture in the classroom) and then answer a few questions. When they come to class the next day, we complete an activity related to the the previous night's video to cement their learning, which replaces the function of homework. This obviously requires you to choose/create a video for the topic at hand, and have a way to get it to your students. Thanks to the amazing entity known as the internet, this is easier than ever.

Edpuzzle
The first step to being able to flip my classroom is choosing a video, and having a way for my students to access it. This website is my jam. It already has a collection of an amazing videos and finding one is as simple as a search to find your topic. You can upload/link any video from youtube, or upload your own videos that you create. I have not created any of my own videos (yet!) because I have always been able to find an appropriate video with a little digging.


For my social studies class my favorite videos are the Crash Course videos with John Green (author of young adult books like the Fault in Our Stars and Paper Towns) and some by a AP Euro teacher named Tom Richy. Sometimes I also find videos that go EXACTLY with my text book, section by section, chapter by chapter. For those of you that teach math/science Kahn Academy has great videos that are already loaded into EdPuzzle.

Another feature EdPuzzle offers is that you can add questions in to make sure your students are paying attention, or make them think deeper about the topics. They have to answer the question in order to move on with the video. It also keeps students from skipping ahead and NOT watching the video, and will even record who has watched the video and who hasn't. No more, "but I watched the video!".... uh no you didn't. You can also see their answers to the questions as well.
Lastly, you can edit and trim the videos to just the sections you want them to see. This is great if you want to use a scene from a movie or just a portion of a video if you find something that you don't want them to see.


Also, you can share the video through a link, or my favorite- by embedding the video into a website or a secondary source. This leads me to the next website that I use religiously, Schoology. Part 2 coming soon!

This website has made my life so much easier. I can plan out a long time ahead, and I can do it from anywhere. So many other teachers use this site and it is so easy to find what you need. I've planned half of my year and there is only ONE case where I have not be able to find what I want. I hope this has been helpful to you and maybe made you aware of a tool that can help you too!

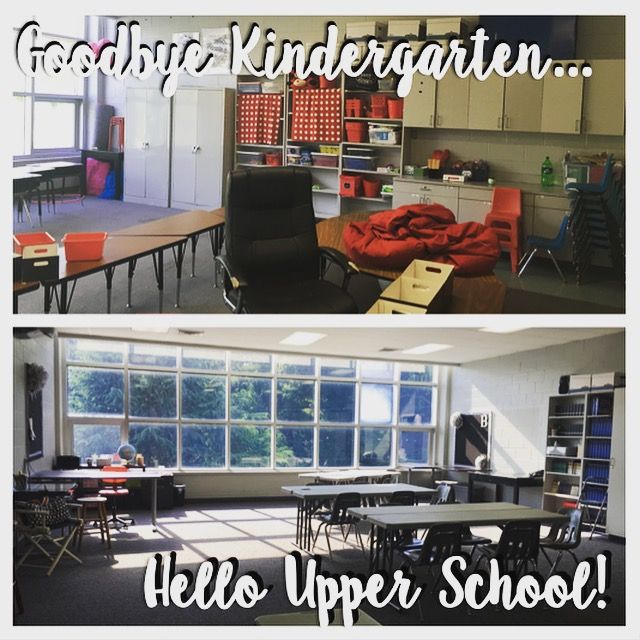
Goodbye Kindergarten..


 photo IMG_0838_zpsw2enrcns.jpg

This fall I'm making a big change. I'm packing up all my kindergarten things, donating/selling my classroom library and heading upstairs. I am going to be teaching 8th & 9th Grade History.

Several people have asked why, and then they follow that question with, but is that what you want? The answer is because I love history, and YES!

Things are definitely going to change for me this year. I've already started writing curriculum, and even buying new decor. I'm looking forward to sharing some of these changes on this blog, and then even start selling some new materials in my TPT store. I hope that with my new schedule I will have a better balance of time and energy and will hopefully blog more regularly too.

Grow Something Green- A Primary Science Unit About Plants

I love spring. It's a hard decision which I love more, spring or fall. Though the warm temperatures of spring are for sure more welcome at the end of a long winter.

One of my favorite units to do in the spring is all about plants. There are so many amazing hands on experiments for the primary classroom, and kids see what they are learning everywhere they go.


I've always just pieced together different activities for this science unit in the past, so I thought it was high time I get organized and really focus in on what I wanted my kinder kids to take away at the end of this unit. From there came my science unit on plants.

This unit has so much amazing stuff packed in. I wrote it to be done in a week, but I almost always stretch this into a two week unit. We just have so many thoughts and questions and FUN.

We start out our plant study with a visit to a local nursery. The one we go to has HUGE indoor green houses that seriously impressed my kids. They just loved seeing rows upon rows of the plants, and many commented how they couldn't believe how warm it was inside the greenhouse.

After asking the poor gardener LOTS of questions, we each got to plant our own flower. It's amazing to me which kids are reluctant to get their hands dirty and which dive right in. We were all VERY proud when we were finished.

Next we explored the rest of the nursery. We looked at herbs, flowers, and even some very young cherry trees. Our guide pulled one out of the soil and we got a really good look at the root system. Our school parking lot is filled with the pink cherry blossom trees and all of our kids drive past them every day. At the time we took this field trip they were in full bloom.

We also got a close look at their hot houses and other special growing environments. This led to great discussions about how different plants need different environments.

After returning to school we jumped right in to our study on plants. We first collected our schema on our anchor chart. My kids knew lots and lots about plants already and were very proud to tell me lots of information they learned on our field trip.


This anchor chart is NOT from my unit. I recreated a fabulous one I saw on pinterest on my computer and then traced it onto chart paper. I didn't want to take someone else's idea for my unit, but there is one that accomplishes the same thing there.

We wrote our ideas onto post it notes and stuck them to the chart on the petals of the flower. Later we will move some of those ideas to the "misconceptions" area, and then add new post-its for our new learning.

We also discussed vocabulary words. I love these vocabulary cards that have real pictures. It's one of my favorite parts of this packet.
 

On Day Two, we discussed the parts of a flower. I made an extra copy of the worksheet and put it under my document camera. As we discussed each part and it's job, I chose a student to put the label in the right place. I also posted the vocabulary card that had a real picture on the board to help them really picture what we were discussing.

After that, each student made their own copy of the page we completed on the document camera together. I loved seeing their personalities in how they chose to color their flower.


On Day Three, we talked about how the foods we eat are actually the different parts of plants. I gave each student a picture of a common vegetable and we discussed which section it needed to go it. 

This led to the first of our experiments. We reviewed what the jobs of each part of the plant are and then decided we needed to see this in action. 
This is a classic and super simple experiment. I describe tips for making it sure it works just like you want it to in my unit. 

On Day 4, we discuss the needs of plants. Usually at this point my students all know what a plant needs but I like to touch on it and do some review since every once in awhile on of my little friends gets a little confused!

This is also the day where I like to do the second of our three experiments for the week. My students can tell me that plants need light and water, but seeing the effects of a plant not getting those makes an impression. I didn't take pictures on this day but this experiment is pretty simple too. You just need four small plants. Two sit in your window and get water and light. One goes in a closet depriving it of light, but getting all the water it needs. The last sits in the sun but gets no water. Usually the kids can see the effects very quickly and you can nurse these "experimental" plants back to health, which is always nice!

On Day 5 we discuss the plant life cycle. By this point of the year we have studied the pumpkin and butterfly life cycle so my students are all pretty familiar as well. But the real fun comes when we plant our seeds!

This year I chose radish seeds. I've heard they grow fast, and are hardy, which is good since they will be sitting up at school over spring break!

So there it is! My Plants unit. We really enjoyed it this week and I hope that you will too!

Math Journals in Kindergarten: 6 Tips for Making It Easy!


Math Journals. For years I have wanted to incorporate these in my classroom. I mean what's not to love? Hands on, engaging, fun. Everything you as a teacher want an assignment to be. I had planned on incorporating them into my math block 2 years ago. Then I was asked to move from 2nd grade to kindergarten.

Though I was excited to teach kindergarten, I was slightly devastated because I didn't think math journals were possible. I mean these kiddos can't even cut things out, can't read yet... not to mention the headache they would give me right? I was SO wrong.

These are my favorite thing that I do in my classroom. I plan to add a phonics and reading comprehension and science/social studies journal next year. THAT'S how much I love them.
But I was right about something. They CAN be a headache. But I have figured out a few tips and tricks to make them easier and a joy, not a pain!

TIP ONE
First, copy your math journal activities on colored paper. This makes them fun, seasonal and eye catching. My kids are so proud of their journals and love the bright colors. I color coordinate for each month to help me grade and stay organized more easily. For example, in March, all pages were on green paper. I grade the journals monthly, and thanks to this idea I can easily and quickly see which section I can grade.

If you don't have a lot of extra colorful paper lying around, consider just doing a divider page that stick out the side of the book slightly to help you divide it up. I personally think that it is worth the investment in my sanity:)

Some teachers will tell you to pre-copy all the pages you need for the whole month. If you're anything like me this doesn't work out so well. First, I usually change my lesson plans. If I was to do this, I would end up with extras at the end of the month, and I am NOT the type of teacher that is good and saving things for next year. I always lose them and NEVER am able to put my hands on them when I need them next year. Instead, I just copy what I need per week and keep them in my handy organizing drawers. This way I'm not wasting any of the glorious colored copy paper either.

TIP TWO
MODEL MODEL MODEL. At the beginning of the year until at least Christmas, I always model how to complete each page. I talk through everything, how I'm cutting, where to put the glue, how to lower your glue stick into it's protective plastic so you don't squish it out, how to neatly color, EVERYTHING. And even after Christmas, I will periodically model if the format for our journals is new. They love to look at my journal and see if their's measures up. This also cuts down on them interrupting my small group time to ask how to complete their journal. I train them to go and look at the model instead.

At the beginning of the year, I have a little method for helping them make sure that they don't skip a page in their journals. This is one of the procedures that I also model. Instead of giving them their activity and just letting them run off, I hold on to the printable and make them go get their materials from their cubby and get set up. This involves getting their journal, and pencil box and going to their seat after leaving the whole group teaching area.

Each student opens their journal, turns to the appropriate page, and puts their pencil box on the left side of their notebook to hold it open. This makes it so much easier for them to work since the book at the beginning of the year will close on itself. When they have done this, they raise their hand to show me they are ready. I then come over, quickly check to be sure they didn't skip a page and their journal is right side up, and then give them their activity. This takes all of 2 minutes and can quickly be done while my small group is getting situated. By Christmas I don't need to check most students' books anymore, but they do it out of habit. I also incorporate this little quick tip that I read on DeeDee Will's blog: if your activity is one that has several "templates" on a page, (i.e. one page will work for 4 students and save you paper!) don't cut them out ahead of time. Simply carry your scissors with you and cut it as you hand it out. Pre-cutting it doesn't really save you any time, but it actually adds time and give you one more thing to do.

TIP THREE
Consider incorporating math journals into your small group math time. Math Journals are a center in my math block. This way I can leave all materials that are needed in a center, and know that everyone is getting an opportunity to get their journal done. They have ample time to work and are practicing their skills independently. I also always leave a center for them to complete when they are done. Since journals require so many fine motor skills, the time it takes a student to complete it varies greatly. Some students take the whole 15 minute rotation to get it complete. Some finish in 5 minutes. Providing a center for them to complete after their journal is finished keeps them occupied and focused.


TIP FOUR
Provide a trashcan. I buy these buckets at the beginning of the year at the Dollar Tree. We usually break 1-2 each year, and one always ends up with mystery stickiness in the bottom, but they are WORTH it. All the little scraps go in them (mostly) and not on your floor (mostly). And the best part is that they don't have to get up out of their chairs to go throw trash away. At the end of the day emptying these mini trashcans is one of the class jobs.

I also train them (during my modeling) to put their extra pieces in their pencil box for safe keeping. This limits (but doesn't eliminate) the losing of pieces. It also helps them if they don't finish in time to have what they need in a safe place so that they can finish later.

**Pro-Tip** Some of my math journals require a dice or a paper clip. I also train them to roll their dice in the lid of their pencil box to limit loud rolling (you know what I mean!!) and wayward dice. They don't keep their dice in their box, but we have them accessible in a centralized location for everyone. I also keep a healthy supply of paper clips there too. These often walk away and sometimes are found in little pockets or fidgety hands during whole group, but for the most part the kiddos respect their math tools.

TIP FIVE
I also recommend using math journals as an assessment. In my school, I am required to take grades and weight them into three categories: daily, minor, major. I count journals as a monthly minor grade. These journals measure their skill abilities, fine motor skills and ability to be independent. I use a rubric that touches on all these skills to assess. I searched and searched for the perfect rubric that included everything I wanted, and was found wanting. So what's a teacher to do besides create your own?  This rubric assesses not only the content, but their coloring, cutting, and ability to follow directions. I am in LOVE.  I think rubrics are so important in kindergarten because so much of our assessing is often slightly subjective. (Is this coloring excellent or just good? What makes coloring excellent?) This helps parents understand what your goals for their child are and lets them know that you are really thinking through what it is you want from each student. I find a lot of comfort and professionalism in that. One of my goals this summer is to create detailed rubrics for more activities in my classroom each week.


TIP SIX
Last tip: put probably double the amount of glue sticks you are currently asking for on your supply list. I probably hand out at least 1-2 new glue sticks everyday to my class of 13 students. I swear they eat them. We did a whole lesson on being sure to respect your "trusty glue" and even practiced putting the lid on effectively. I even save the caps from the old gluesticks so that there is never an excuse for your glue to dry out. Every time I model how to do a page, I always make a big deal out of how to properly handle glue and my littles have completely bought into it. Despite this, they still are always needing a new glue stick. So be sure to get lots and be prepared to need more.


That's it! Six tips for helping you be effective with your math journals. And just because I don't want you to have to scour the internet for the perfect rubric, I'm going to offer you mine here as a little freebie. I hope it helps you out and makes you feel like you can rock those math journals!


QR Code Listening Centers

I recently added some new products to my store that I'd like to share. These are some of my most used products and they have made my life WAYYY easier. Enter: QR Code Listening Centers!


These listening centers make my literacy block a lot easier. My students are engaged and listening to high quality stories. It's so important for young readers to listen to fluent readers read aloud and this allows them do that while also interacting with technology. I like to put the books that my students listen to on my display shelf that I change monthly. This makes the books easily accessible and my students are never wasting time rooting around for the book they want in my library. This display shelf allows my thematic books for the month to be accessible to other students as well, and not all hidden in the listening center.

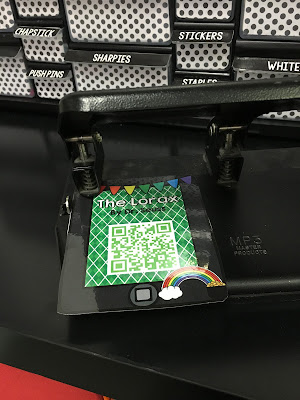
I love these QR codes because it is so easy for my students to use them. The iPods/old iPhones that we use for this ONLY have a QR code scanner and maybe one other app on them so it's easy to get to.  Any other apps that I can't remove are hidden in a folder on the iPod and the QR reader is the only app in the dock. This keeps the process simple and keeps my students from roaming the depths of the internet.

To prep this center is crazy easy. Simply print out your cards. I prefer card stock because they get handled by lots of little hands and we all know the wear and tear kindergartens put onto stuff!


Then I laminate them on my personal laminator. I find the plastic is just a little thicker than the large laminator I get to use through the school. Once again rough handling is a true #kindergartenproblem.


I've had this laminator going on 5 years or so now, and I LOVE it. It's starting to make a little noise here and there, but over all I have no complaints, and the finished product is just so darn sturdy!


Next, cut out your cards. Being the OCD teacher that I am, I will only do this myself to make sure they are all JUST right!


Now at this point you have a couple options: You could stick the one card you want them to use to the wall. This gives you maximum control over which book is being read. Sometimes if I notice some rumbles/disagreements about book selection happening in this center I will take away the stack of cards and just have one card posted at a time.

You could also stick them all up on a bulletin board to display all month. I've seen teachers do this when they have multiple ipads/ipods. The students can walk up, scan and go find a spot to listen in the room. I don't have enough iPods for this, so we all share a dock that allows up to 6 listeners at a time. I usually have 2-3 students at this center at once. I'd love to have 3-4 iPods and be able to let them all listen on their own! #goals

What I typically end up doing is posting the wholes stack in the center at once for them to choose from. I punch a hole in the corner of each card and slip them onto a binder ring. They can flip through all the choices, and hang them back up on the hook when they are done. This option requires the maximum amount of handling by the little people, but I've never had an issue with then getting torn up when I use card stock and my personal laminator.


My kids love these. They love feeling so grown up and using the QR code, and visitors to our class are always impressed with the kids' techy skills. I also love that they can be independent. I always do a BIG mini-lesson at the beginning of the year on how to use the iPod, what to do when you get stuck, etc... Love my document camera for this!


Lastly, I love that these are safe. I have filtered them through safeshare.com so that ALL those pesky ads are gone. You never know when a Victoria's Secret ad is going to play. You'd think google would realize that a child is most likely the audience listening to an Eric Carle book and is not Victoria's Secret's target audience, but believe me, it's happened! The month before the Alvin and the Chipmunks Movie all my videos were preceded by Alvin singing his version of Sir Mix A Lot's biggest hit. That's when I decided SafeShare was in order.

I also include a generic listening center response sheet the kids can fill out. They rate the book and then draw/write about their favorite part. I plan to include different sheets for each book in future updates, as well as more differentiated sheets for different grade levels.


So there they are! My QR Code Listening Centers. Always a huge hit in my class. I'm hoping to create lots of themes in the future as well because I love to stick a little science or social studies in to our literacy time!

Don't forget to check out the bundle to help you save some money! I'll be adding packets for each month regularly until I have a whole year's worth. Check it out!

What themes would you love to see? Oceans? Butterflies? Black History Month? I'd love to hear some suggestions!

Popular Posts

Like us on Facebook

Flickr Images